TL;DR
A closet can serve as an effective, budget-friendly vocal booth if you focus on absorbing reflections, sealing gaps, and ensuring proper ventilation. Moving your rig away from your workspace reduces noise more than foam can, making the closet the perfect ‘rig in the closet’ solution for small spaces.
Acoustic dampening
& the rig in the closet.
The most powerful noise fix isn’t a material — it’s a floor plan. A rig you can’t hear because it’s in another room beats any amount of foam. Tap the approaches in Part 1 to see what actually works.
(another room)
(levers 1–4)
(door / barrier)
(acoustic foam)
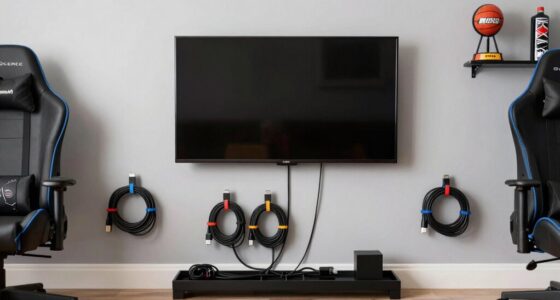
Contain the noise, not the heat
Key Takeaways
- Sealing gaps around the door and vents is more effective than adding endless foam panels.
- Moving your rig into another room or closet drastically reduces noise and is the highest-value fix.
- Placement of absorption materials at reflection points and corners makes the biggest difference in sound clarity.
- Proper ventilation is critical when putting a hot rig in a sealed closet to prevent overheating.
- Choosing a dynamic mic and close positioning can greatly improve audio quality in small, reflective spaces.

TroyStudio Thickened 12 X 12 X 3 Inch Acoustic Foam Panels in Diffusion Pattern, 32 Pcs High Density Sound Absorbing Foam Diffuser, Soundproof 3D Wall Padding Tiles for Recording Studio Home Office
【SPECIFICATIONS】: Size - 12 X 12 X 3 inches, pack of 32; Coverage - 32 square feet; Weight...
As an affiliate, we earn on qualifying purchases.
As an affiliate, we earn on qualifying purchases.
Why a closet can actually be a perfect spot for your setup
Most people assume a closet is too small or too echoey to be useful. The truth? It’s the perfect candidate for a DIY vocal booth, especially if you focus on absorption and sealing. The truth? It’s the perfect candidate for a DIY vocal booth, especially if you focus on absorption and sealing. For example, imagine recording a podcast in a walk-in closet; the narrow walls trap sound waves, causing fewer reflections and making your voice sound clearer. The small volume acts like a natural sound chamber—think of it like singing in a bathroom where sound bounces around less, resulting in a more direct, focused tone. Plus, the closet’s confined space naturally muffles external noises, like street sounds or household chatter, so your recordings are cleaner. But remember, this tight space can also heat up quickly, so you need to balance sound treatment with ventilation. Overall, the shape and size of a closet aren’t just limitations—they’re advantages that can help you create a controlled acoustic environment without expensive upgrades.

Focusound 52 Pack Acoustic Foam Panels 1" x 12" x 12" Sound Proof Foam Panles Soundproofing Noise Cancelling Wedge Panels for Home Office Recoding Studio with 300PCS Double-Side Adhesive
Soundproofing - Acoustic foam panels triangular grooves structure for better noise absorption, helps to reduce and absorb unwanted...
As an affiliate, we earn on qualifying purchases.
As an affiliate, we earn on qualifying purchases.
How to turn a closet into a professional-sounding vocal booth
Transforming a closet into a usable vocal booth involves strategic placement of absorption materials. For example, if you’re recording vocals, treat the reflection points—places where sound bounces directly back from the wall behind your mic, the ceiling above, and the door. Use foam panels or blankets on these spots; for instance, placing a foam panel just behind your microphone helps prevent sound bouncing directly into it. Bass traps in corners are essential—think of them like catching the low-frequency 'rumble' that tends to build up in small spaces, similar to how a corner of a room can amplify bass sounds in a home theater. Sealing gaps around the door with weatherstripping is like closing the lid on a box—it keeps unwanted noise out and your sound in. Placing a soft rug on the floor reduces reflections from hard surfaces, much like how a carpet dampens sound in a room. These steps turn an ordinary closet into an effective recording space, just like how a home studio uses specific placements of foam and traps to optimize sound. Keep in mind, over-treatment can make the space sound dull, so find a balance—think of it as seasoning food; a little goes a long way.

SQKM Weather Stripping Door Seal Strip, D-Shaped Self-Adhesive, Soundproof Blocks Cold Drafts & Dust, Black TPE 20Ft (3/8" W × 1/4" T) for Door Frames & Windows
【THICKENED TPE SEAL & SAVE】Crafted from premium thickened TPE, this D-Shaped Weather Stripping boasts strong sealing and anti-deformation...
As an affiliate, we earn on qualifying purchases.
As an affiliate, we earn on qualifying purchases.
Where to place sound-absorbing materials for maximum effect
Placement is everything when it comes to acoustic dampening in a small space. For example, if you sit at a desk in your closet, hold a small mirror against the wall behind your microphone—if your reflection appears in the mirror when you’re in your usual recording position, that’s a reflection point. Treat these spots with foam panels, much like how a concert hall uses strategically placed panels to control sound. Corners are also critical—think of them as the 'bass traps' of the room, where low frequencies tend to gather. Placing foam or pillows in the corners is like installing a sponge that soaks up the deep bass sounds, preventing them from muddying your recordings—similar to how bass traps in a home theater improve sound clarity. Covering hard surfaces like your desk with a soft cloth or mat reduces unwanted reflections, much like how a music producer uses diffusers and absorbers to create a balanced sound. The goal is to target the main reflection paths—imagine a game of acoustic hide-and-seek—so that you’re reducing echoes while keeping some natural liveliness, just like tuning a musical instrument for perfect harmony.

Portable Recording Booth for Home Studio, Foldable Sound Isolation Vocal Shield with Floor Stand, High-Density Acoustic Blanket Enclosure for Singing, Voiceover & Podcast, Includes Phone Holder
INSTANT STUDIO-QUALITY "DRY" SOUND: Transform any noisy room into a professional vocal booth instantly. Engineered with high-density acoustic...
As an affiliate, we earn on qualifying purchases.
As an affiliate, we earn on qualifying purchases.
Why sealing the door and gaps is your top priority
The biggest leak in a closet setup isn’t the walls — it’s the door. For example, if your door has visible gaps around the edges, sound can escape like a leaking pipe, letting noise out and unwanted noise in. Using weatherstripping or draft stoppers around the doorframe is like sealing a window—suddenly, external sounds like traffic or household noise are minimized, just as closing a window blocks out street noise. Think of it as closing the lid on a jar—sound can’t escape as easily, keeping your recordings clean. If your door is hollow or poorly sealed, internal reflections can also bounce around, creating a hollow or echoey tone—like talking in a cave. Adding a heavy blanket or foam around the door edges is similar to putting a curtain over a window— it dampens sound transmission. These simple fixes can reduce sound leaks by over 60%, much like how sealing gaps in a wall improves overall soundproofing. It’s a small investment for a big difference, making your setup more professional and consistent.
Ventilation tips: keeping your rig cool in a sealed closet
Putting a hot, high-powered rig in a closet is like trying to cook in a sealed oven—overheating can cause problems. For example, if your computer or audio interface gets too hot, it might shut down or slow down, affecting your recording quality. Installing a small, quiet exhaust fan—like a computer case fan—can help move hot air out, much like how a car’s ventilation keeps the engine cool. Passive vents are okay, but active airflow with ducted fans and mufflers prevents noise from escaping while keeping the space cool—think of it as a silent, controlled breeze. In small, sealed spaces, heat builds up quickly, similar to how a closet can become stifling in summer without ventilation. Proper airflow prevents thermal shutdowns and hardware damage, ensuring your equipment runs smoothly during long sessions. For detailed tips, check out this airflow guide. It’s like giving your rig a personal air conditioning system—quiet, effective, and essential for maintaining quality.
How to pick the right microphone and placement in a closet
In a small, reflective space, your microphone choice matters more than you think. For example, a dynamic microphone like the Shure SM58 naturally rejects background noise and room reflections better than a condenser mic, making it ideal for closet setups. Place the mic close to your mouth—about 6-12 inches—and angle it slightly downward or to the side to avoid capturing reflections from the walls behind you. Using a reflection filter or shield—like a portable vocal booth—can help, but proper placement is key. For instance, if you notice echo or reverb, try moving the mic closer or adjusting its angle; sometimes, a slight shift can cut reverb by half, similar to how a musician adjusts their mic to get the best sound. Remember, the closer and more directed your mic, the less room sound it picks up—like focusing a flashlight beam instead of illuminating the whole room. Selecting the right mic and positioning it properly is your first line of defense against muddy sound and unwanted reverberations, making your recordings clearer and more professional.
DIY tricks: multi-layer absorption and using everyday materials
When budget’s tight, creative solutions can make a real difference. For example, layering blankets, duvets, or thick towels around your mic and walls acts like a homemade sound cocoon—imagine wrapping yourself in a quilt to block out noise. Placing foam panels behind the mic and on reflection points like the ceiling or walls is similar to how a professional studio uses soundproof curtains—adding multiple layers enhances absorption. Air gaps between layers, like sandwiching foam between blankets, create damping cavities that dissipate sound more effectively—think of it as adding extra padding to a cushion. For low-frequency control, stack pillows or blankets in corners—like building a soft barrier that traps bass sounds, preventing them from bouncing around and muddying your recordings. While these DIY methods won’t replace professional treatments, they significantly improve sound quality—reducing echo and standing waves. The key is layering and strategic placement—more layers mean better absorption, but too much deadness can dull the sound, so find a balance. These simple tricks, like wrapping your space in blankets, can turn a basic closet into a surprisingly effective recording spot, especially when combined with good microphone placement and sealing gaps.
Common myths: what really works and what’s a waste of time
Many believe more foam equals better sound. For example, covering every inch of your closet with foam might seem like a good idea, but in reality, excessive foam can deaden your room, making recordings sound dull and unnatural—like singing in a padded cell. Corner bass traps are often overlooked, yet they’re crucial because low frequencies tend to gather in corners—imagine the way sound echoes in a canyon, with deep bass bouncing around. Sealing gaps around the door and vents is far more effective than adding extra panels; it’s like closing the windows to keep out noise instead of filling the room with foam. And here’s a big one: moving your rig into another room or closet far reduces noise more than adding foam ever could—think of it as simply relocating the source of noise rather than trying to contain it. A well-sealed, minimally treated closet that targets reflection points and leaks will outperform a cluttered wall of foam that doesn’t address these fundamental issues. Understanding these tradeoffs is like knowing which ingredients make a dish taste better—prioritize what truly improves your sound environment to save time and money while getting better results.