
To save money later, choose standard, practical room sizes with enough clearance for equipment and comfortable movement, typically around 10-12 feet ceiling height. Avoid irregular or overly large spaces, as they increase costs for construction and cooling. Opt for modular, flexible designs that can adapt to future upgrades without major costs. Properly planning your layout now guarantees efficiency and minimizes long-term expenses, and if you keep exploring, you’ll discover more tips to optimize your simulator setup.
Key Takeaways
- Use standard room sizes to reduce material waste and simplify construction, lowering initial and future renovation costs.
- Opt for a rectangular or square layout to ensure even lighting and sound reflection, minimizing costly acoustic treatments.
- Maintain a ceiling height of at least 10-12 feet to improve lighting, soundproofing, and prevent a cramped feel.
- Design with modular, reconfigurable features for easy upgrades and expansions, avoiding expensive renovations later.
- Incorporate practical access points and durable materials from the start to ease maintenance and reduce ongoing expenses.
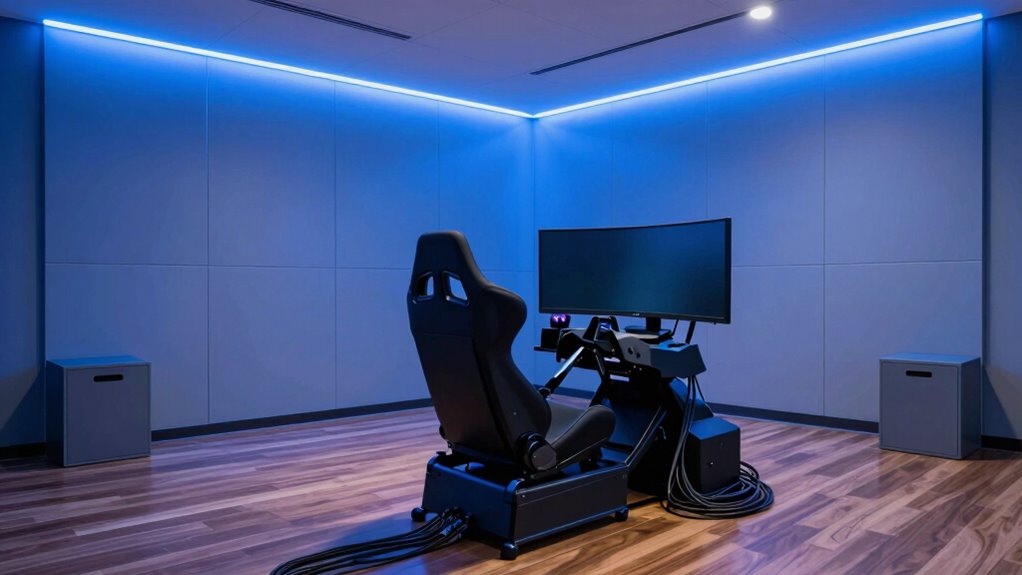
simulator room ceiling height 10-12 feet
As an affiliate, we earn on qualifying purchases.
As an affiliate, we earn on qualifying purchases.
Why Does Room Size Matter for Your Simulator Budget?
Have you ever wondered how the size of your simulator room can impact your overall budget? Larger rooms often require more decorative accents to make the space inviting, which can increase costs. Additionally, bigger rooms demand more lighting fixtures to guarantee proper illumination, adding to your expenses. On the other hand, smaller rooms may cut costs on decorative accents and lighting, but can limit your experience. Finding the right balance between room size and design elements helps you save money both now and later. Properly sized spaces reduce the need for excessive lighting fixtures and decorative accents, lowering initial setup costs. Plus, a well-planned room size minimizes ongoing energy expenses, making your simulator investment more economical over time. Considering soundproofing options during planning can also prevent future noise issues and additional expenses. Incorporating acoustic-treatment strategies from the start can further enhance your experience and reduce the need for costly adjustments later. Being mindful of the environmental impact of tissue paper when choosing materials for decor can also contribute to a more eco-friendly setup.
How to Determine the Best Room Dimensions for Your Simulator
To choose the best room dimensions for your simulator, you need to take into account ideal space requirements that allow comfortable movement and proper setup. Ceiling height is vital to prevent restrictions and guarantee realistic simulation experiences. Also, evaluating the room shape and layout helps maximize space efficiency and avoid costly modifications later. Incorporating appropriate projector placement considerations ensures optimal image quality and viewing angles, which are essential for an immersive experience. Additionally, understanding digital concepts can help you design a more adaptable and future-proof setup.
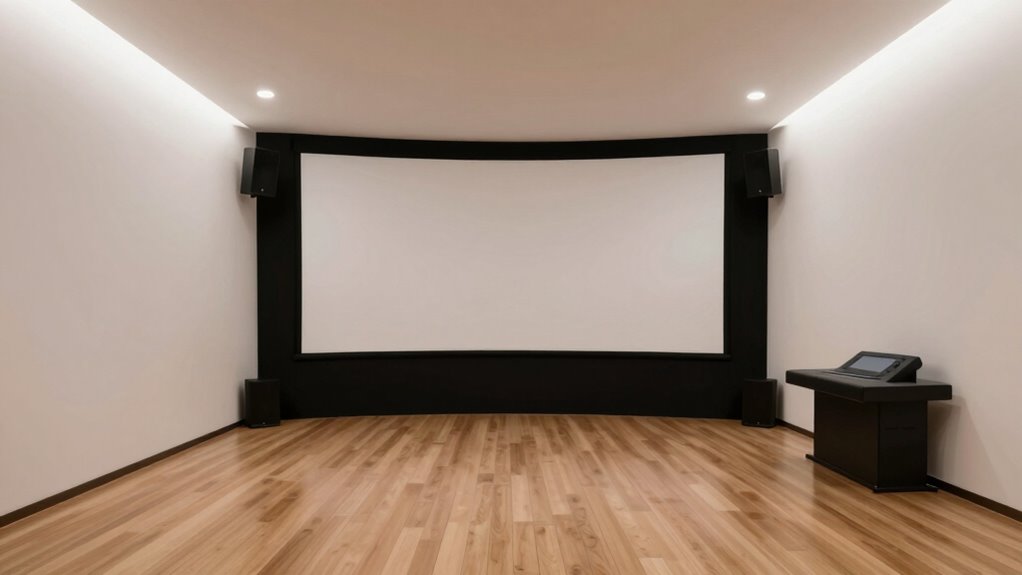
Optimal Space Requirements
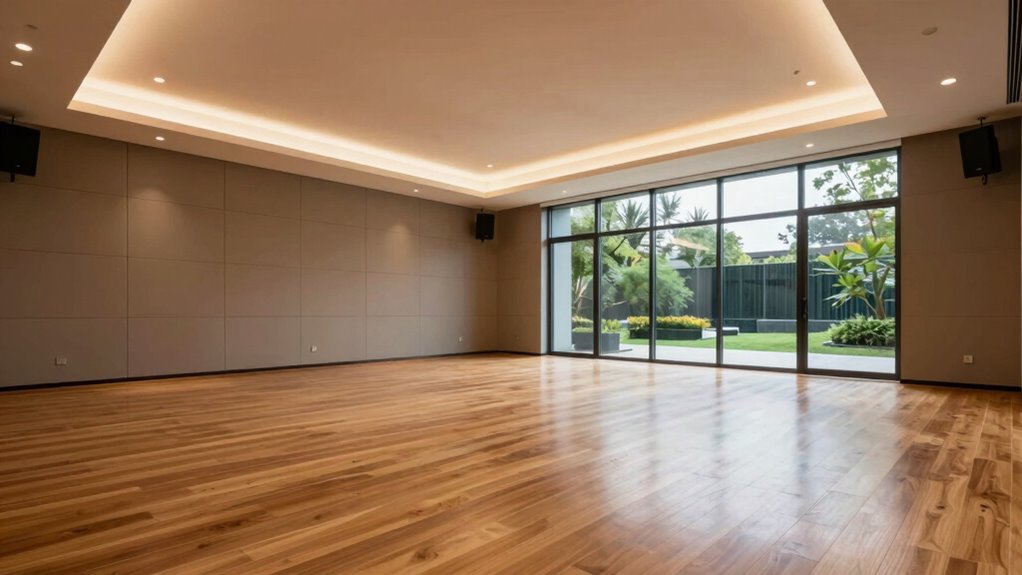
Choosing the right room size is essential for creating an effective simulator experience without wasting space or money. You need enough room to move comfortably and incorporate essential elements like decorative lighting to enhance immersion. A well-sized space prevents feeling cramped and allows for proper soundproofing techniques, which are vital for minimizing noise transfer and improving audio quality. Consider your simulator’s dimensions, ensuring there’s ample clearance around equipment for safety and comfort. Avoid overly large rooms that increase heating and cooling costs. Instead, aim for a balanced size that maximizes functionality while keeping expenses in check. Proper planning ensures the room supports your setup, improves user experience, and saves money by preventing costly modifications later. Additionally, understanding boating safety fundamentals can help inform your space planning to create an environment that minimizes hazards and promotes safe operation. Paying attention to market reputation and customer feedback can also guide your choices to ensure quality and reliability in your setup. Incorporating efficient space utilization strategies can further optimize your layout and reduce unnecessary costs.
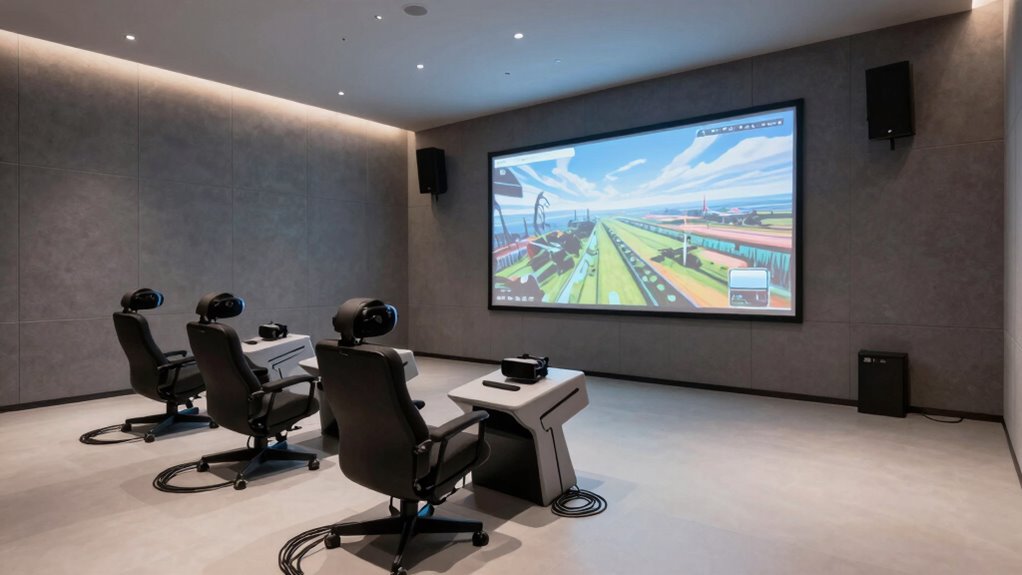
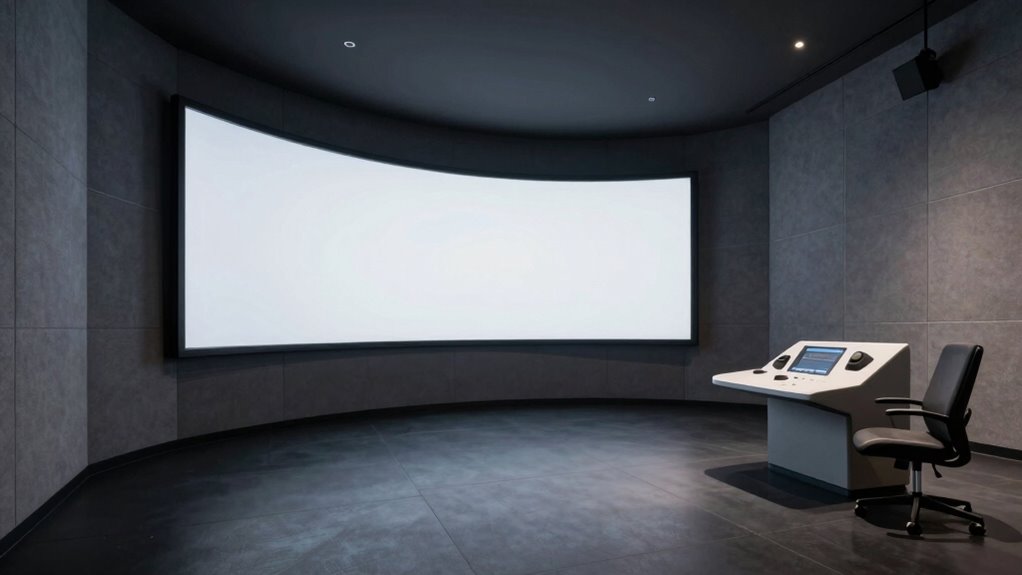
Ceiling Height Considerations
Since ceiling height directly impacts both comfort and safety, it’s essential to determine the right dimension for your simulator room early in the planning process. A higher ceiling allows for better lighting setup, reducing shadows and creating a more realistic environment. It also provides space for soundproofing techniques, such as acoustic panels or diffusers, which need room to absorb or scatter sound effectively. Adequate ceiling height prevents a cramped feeling and minimizes noise transfer to other areas. Generally, a minimum of 10 to 12 feet is recommended, but taller ceilings improve ventilation and overall experience. Additionally, considering acoustic treatment during design can significantly enhance sound quality and immersion. Incorporating protective styling benefits from various design options can also help safeguard your equipment and improve the room’s usability over time. Keep in mind that increasing height can add costs, so balance your budget with these benefits to optimize your simulator space efficiently.
Room Shape and Layout
Selecting the right room shape and layout can considerably influence your simulator’s performance and comfort. Opt for a rectangular or square shape, which helps with even lighting design and minimizes sound reflections. Avoid irregular or overly narrow spaces that can create dead spots or echo issues. Proper acoustical treatment should be integrated into the layout—placing sound-absorbing panels strategically to reduce noise and improve audio clarity. Consider the placement of lighting to ensure even coverage, avoiding shadows and glare that can distract or cause eye strain. A well-planned layout also allows for clear pathways and easy access to equipment. These elements work together to optimize your simulator environment, guaranteeing savings on unnecessary modifications later and enhancing your overall experience.
What Key Measurements Do You Need for Safe, Immersive Play?
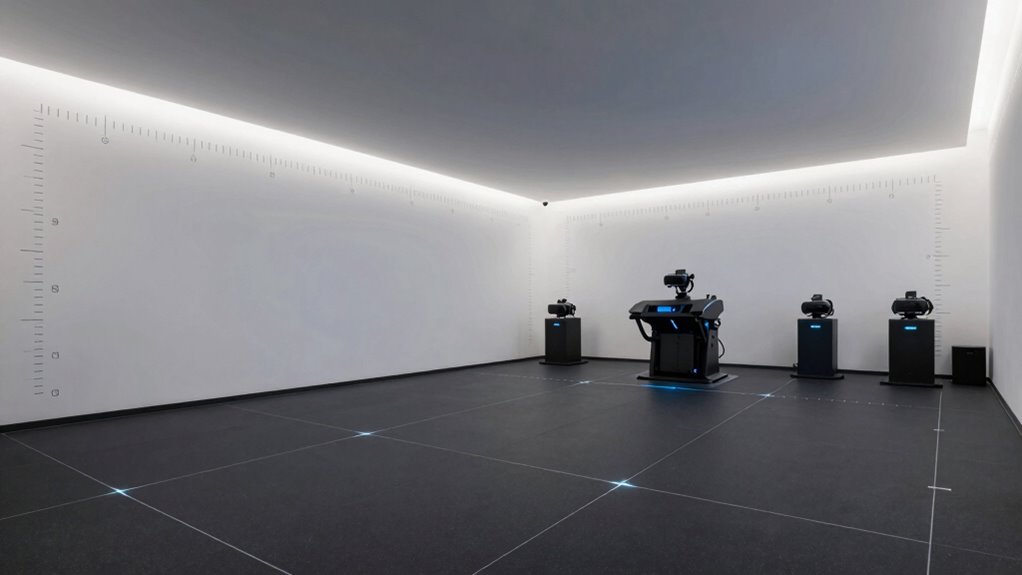
To guarantee your simulator room provides a safe and immersive experience, you need to focus on key measurements that define the space’s functionality. These include ceiling height, which affects movement and comfort; room width and length, ensuring ample space for equipment and user movement; and clearance around equipment for safety. Proper lighting setup is essential to reduce eye strain and enhance realism, while soundproofing techniques prevent noise disturbance and improve immersion. Additionally, incorporating elements like outdoor features such as landscaping or outdoor lighting can further enhance the overall environment. Considering room measurements that optimize space utilization can also contribute to a more efficient and enjoyable setup. Being aware of tax law updates can also help in planning your space investments more effectively, especially when considering potential tax benefits or deductions. Paying attention to soundproofing methods can ensure a quieter, more realistic experience while minimizing external disruptions. Furthermore, understanding ergonomics can assist in designing a comfortable and sustainable environment for long-term use.
How to Estimate Your Room’s Footprint Based on Equipment

Determining your room’s footprint starts with understanding the dimensions of the equipment you plan to install. Virtual reality setups often require space for sensors, headsets, and movement, so measure each component carefully. Consider the size of your VR headset, controllers, and any motion tracking devices. If you’re integrating soundproofing techniques, account for additional space needed for panels or barriers to minimize noise transfer. Think about how much clearance you’ll need around equipment for safe movement and setup. Keep in mind that larger equipment or multiple devices increase your room’s footprint, so plan accordingly. Accurately estimating these dimensions now helps you avoid costly adjustments later, ensuring your space remains functional, immersive, and cost-effective over time. Additionally, incorporating noise machines for sleep can help create a calming environment, especially if your setup involves soundproofing or acoustic treatments.
What Common Sizing Mistakes Can Cost You More Later?
Failing to accurately size your VR room can lead to costly consequences down the line. Poor planning often results in cramped or overly spacious setups, which increase expenses and reduce immersion. Common mistakes include:
Inaccurate VR room sizing leads to costly, immersive, and inefficient setups. Proper planning is essential.
- Ignoring space for decorative lighting that enhances ambiance without crowding the room.
- Overlooking soundproofing techniques, leading to noise complaints or needing costly upgrades later.
- Underestimating room dimensions, causing equipment to be too close or too far apart.
- Failing to account for clearance around equipment, which affects movement and safety. Additionally, understanding the importance of proper room sizing can prevent the need for costly modifications after setup.
- Neglecting to consider ergonomic design principles, which are essential for long-term comfort and safety.
- Proper space planning ensures that equipment placement is both functional and adaptable for future needs. Recognizing the value of modular design can help create a flexible setup that evolves with your needs without requiring extensive reconfiguration. Being aware of air quality considerations can also help maintain a healthy environment in your VR space, avoiding issues caused by dust or poor ventilation.
These errors can force you to retrofit or expand, costing more than proper initial sizing. Proper planning helps avoid these pitfalls, ensuring your space remains efficient, immersive, and cost-effective over time.
How to Maximize Small or Irregular Spaces for Your Simulator

Maximizing small or irregular spaces requires strategic planning and creative solutions to make the most of what you have. Start by using decorative accents to add character without cluttering the room, which can also enhance the immersive experience. Focus on lighting design to create a sense of openness—use layered lighting, such as wall sconces or adjustable LEDs, to brighten corners and eliminate shadows. Mirrors can visually expand the space and reflect light, making the room feel larger. Multi-functional furniture, like fold-away desks or compact seating, helps optimize limited square footage. Keep the layout simple and avoid overloading the room with unnecessary decor. With thoughtful placement of decorative accents and smart lighting, you’ll transform even the smallest or irregular spaces into effective simulator environments. Paying attention to architecture details, such as door swings and stair proportions, can further optimize the room’s usability and flow.
Planning for Future Upgrades Without Breaking the Bank
Choosing a modular design lets you upgrade or expand your simulator without costly renovations. Flexible space planning guarantees your room adapts easily to new equipment or tech. With these strategies, you can stay current without overspending down the line. Additionally, considering early detection techniques can help identify potential issues early, saving costs on future medical expenses. Incorporating luxury lifestyle products into your space can also enhance comfort and functionality, ensuring your investment remains stylish and practical over time.
Modular Design Advantages
Designing your simulator room with a modular approach allows you to easily upgrade or expand in the future without significant costs or disruptions. This flexibility guarantees your setup remains current and adaptable. With modular design, you can:
- Swap out or upgrade decorative accents like artwork or wall panels without redoing the entire room.
- Adjust ambient lighting setups as technology improves or your preferences change, keeping the space inviting.
- Add new simulation hardware or screens effortlessly, saving money on major renovations.
- Reconfigure room layouts easily, accommodating additional equipment or comfort features later.
This approach minimizes long-term expenses and downtime, letting you enjoy your simulator now while planning smarter upgrades later. Modular design keeps your space future-proof and cost-effective.
Flexible Space Planning
Planning your simulator room with flexibility in mind guarantees you can upgrade or expand without draining your budget. Start with a versatile lighting setup that allows easy adjustments or additions later. Use adjustable fixtures and wiring pathways to accommodate new tech or ambiance changes without costly rewiring. Sound insulation should be designed to be scalable; consider modular panels that can be added or modified as your needs evolve. Keep open pathways and adaptable wall placements to facilitate future modifications. This way, you avoid tearing down walls or disrupting existing systems. Prioritizing flexible space planning minimizes long-term costs and hassle, ensuring your simulator room can grow alongside your ambitions. With thoughtful planning, you create a future-proof environment that adapts seamlessly to new upgrades.
Using Standard Room Sizes to Save on Construction Costs
Using standard room sizes can considerably cut construction costs by streamlining the building process and reducing material waste. When you stick to common dimensions, you simplify framing, drywall, and flooring, saving time and money. Additionally, standard sizes make it easier to choose cost-effective materials and implement soundproofing techniques efficiently. To maximize savings, consider:
- Choosing room dimensions aligned with common building codes and material sizes.
- Using neutral color schemes that require fewer custom finishes.
- Incorporating modular soundproofing solutions that fit standard room dimensions.
- Avoiding complex architectural features that add to material costs.
Sticking to these standard sizes not only helps control expenses but also streamlines future upgrades or repairs. It’s a practical way to keep your simulator room budget-friendly without sacrificing quality.
How Proper Planning Reduces Long-Term Maintenance Expenses

By choosing standard room dimensions, you set a solid foundation for easier maintenance down the line. Consistent measurements simplify installing decorative elements and maintaining ambient lighting, reducing wear and tear. When your room is designed with practicality in mind, it minimizes the need for frequent repairs or replacements. Proper planning also means considering access points for cleaning and servicing equipment, preventing costly future fixes. Selecting durable materials that complement your standard layout helps preserve the room’s appearance and functionality over time. Avoiding overly complex designs reduces the risk of damage or misalignment, saving money on repairs. Overall, thoughtful planning ensures your simulator room stays in top condition longer, cutting down long-term expenses and keeping your investment profitable.
Frequently Asked Questions
What Are the Ideal Ceiling Heights for Different Types of Simulators?
For different simulators, you should aim for ceiling heights of at least 10-12 feet to guarantee proper lighting design and ventilation strategies. Higher ceilings help prevent overheating and improve airflow, creating a comfortable environment. For flight simulators, 12-14 feet is ideal, while driving or training simulators can work well at 10-11 feet. Proper ceiling height enhances overall performance and safety, saving you money on future upgrades or climate control costs.
How Does Room Shape Impact Simulator Installation Costs?
Your room shape is the blueprint of your savings. A well-designed, rectangular space simplifies lighting design and ventilation, reducing installation costs and ongoing expenses. Irregular or complex shapes can turn setup into a maze, increasing the need for custom lighting and advanced ventilation systems. Straightforward layouts streamline construction, lower labor costs, and guarantee your simulator operates efficiently, saving you money in the long run.
Can Movable Partitions Optimize Space for Multiple Simulator Setups?
Yes, movable partitions can enhance space for multiple simulator setups. They allow you to reconfigure interior lighting and flooring materials easily, adapting the room layout to different needs. By using flexible partitions, you can save money on construction costs and future modifications. This setup also helps maintain ideal lighting and flooring conditions for each simulator, ensuring better performance and a more efficient use of your space.
What Are the Safety Clearance Requirements for Seating and Equipment?
You need to guarantee proper safety clearance for seating and equipment, considering lighting design and ventilation efficiency. Maintain at least 3 feet of clearance around seats and equipment to prevent accidents. Good lighting reduces shadows, while efficient ventilation keeps the air fresh and prevents overheating. These measures help create a safe environment, minimize risks, and ensure smooth operation of your simulator, ultimately saving you money on repairs and safety issues later.
How Can Room Acoustics Influence Overall Simulator Costs?
Room acoustics greatly influence simulator costs because poor acoustics can require costly acoustic treatments and soundproofing to reduce noise and echo. By designing the room with proper soundproofing and acoustic treatments from the start, you avoid expensive retrofits later. Good acoustics enhance user experience and reduce the need for additional noise control measures, ultimately saving you money while ensuring a high-quality simulation environment.
Conclusion
By paying close attention to your room’s dimensions from the start, you’ll set yourself up for a smoother, more budget-friendly simulator experience. Avoiding common sizing mistakes and planning for future upgrades means you won’t be caught between a rock and a hard place later on. Remember, a well-thought-out space can save you money in the long run—it’s better to have a plan than to be caught with your pants down when unexpected costs pop up.